Configuring Redmine Instance for Construct Integration
This guide provides detailed instructions for configuring a Redmine instance for integration with Construct, enabling project associations and efficient issue tracking.
Process Overview
This process ensures the Redmine instance is configured correctly to integrate with Construct, allowing project associations and advanced functionality.
Process Output
The outcome of this process includes:
- A fully configured Redmine Instance.
- A Redmine project prepared for association with Construct tenants.
Process Inputs
This process is performed when enabling Redmine integration in Construct.
Redmine Integration Documentation Order
- How to Configure Redmine Instance
- How to Set Redmine API Access Key for Users in Construct
- How to Create Association Between Redmine Project and Construct Tenant
- How to Use Redmine Within Construct
Process Roles
Administrator
Process Activities
Introduction
This guide covers the tasks necessary before associating a Redmine project with a Construct tenant.
Enabling Redmine REST Service
-
Log in as a Redmine Administrator and navigate to the Administration page.
 Figure 1: Navigating to administration page
 -
Open the Settings page.
 Figure 2: Navigating to Redmine settings
 -
Enable the Redmine REST web services option in the API section and click Save.
 Figure 3: Enabling REST web services
Creating a Redmine Project
-
Navigate to the Projects page.
 Figure 4: Navigating to Redmine projects
 -
Click the New Project button to open the project creation form.
 Figure 5: New project form
 -
Fill in the required fields:
- Uncheck the Public checkbox to make the project private.
- Set the Name and Identifier fields as needed.
-
Click Create to finalize the project.
Creating Trackers
-
Navigate to the Tracker Management page.
 Figure 6: Tracker management
 -
Review existing trackers.
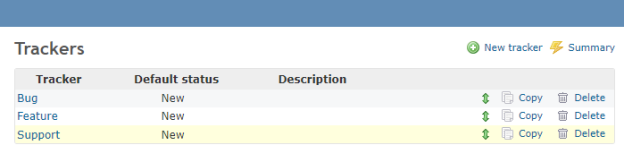 Figure 7: Available Redmine Trackers
 -
Add the following trackers:
- Content Tracker: Tracks issues for content items (pages, articles, blocks, components).
- Course Tracker: Tracks course states (Content Review, Transferred).
- Additional trackers as needed.
-
Create a tracker by clicking the New Tracker button.
-
Content Tracker Example:
 Figure 8: Creating Content Tracker
 -
Course Tracker Example:
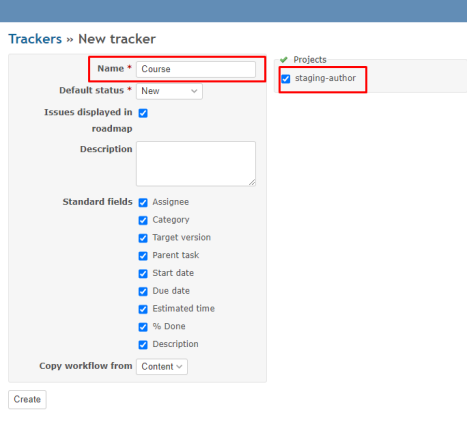 Figure 9: Creating Course Tracker
-
Creating MAXRES Custom Fields
-
Navigate to the Custom Fields page under Administration.
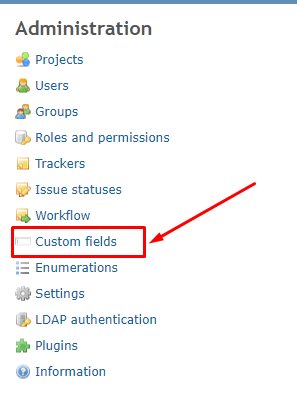 Figure 11: Navigating to Custom fields
 -
Add the following custom fields:
-
MAXRES:
- Format: Text
- Name: MAXRES
- Min-Max Length: 1–255
- Enable Required, Used as a Filter, and Searchable options.
- Assign to relevant projects and trackers.
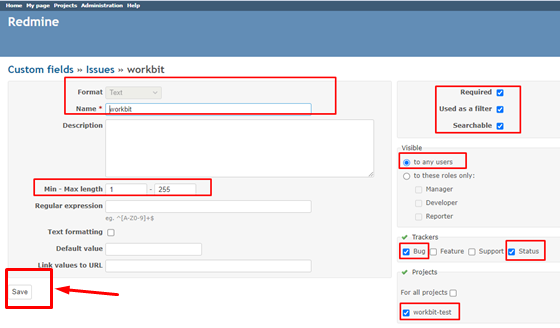 Figure 15: Configuring MAXRES field
 -
MAXRES_location:
- Format: Text
- Name: MAXRES_location
- Min-Max Length: 1–255
- Enable Used as a Filter and Searchable options.
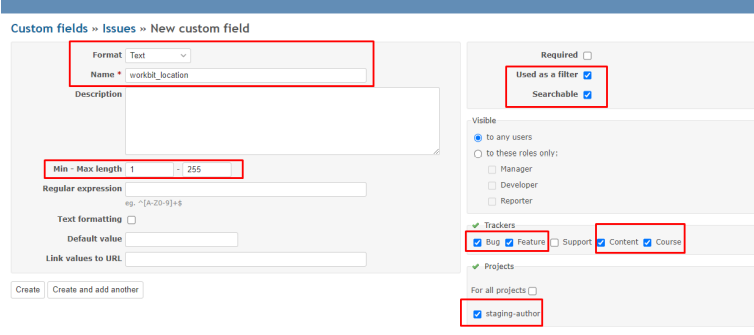 Figure 16: Configuring MAXRES_location field
 -
MAXRES_course_status:
- Format: List
- Name: MAXRES_course_status
- Possible Values: Content Review, Transferred
- Enable Required, Used as a Filter, and Searchable options.
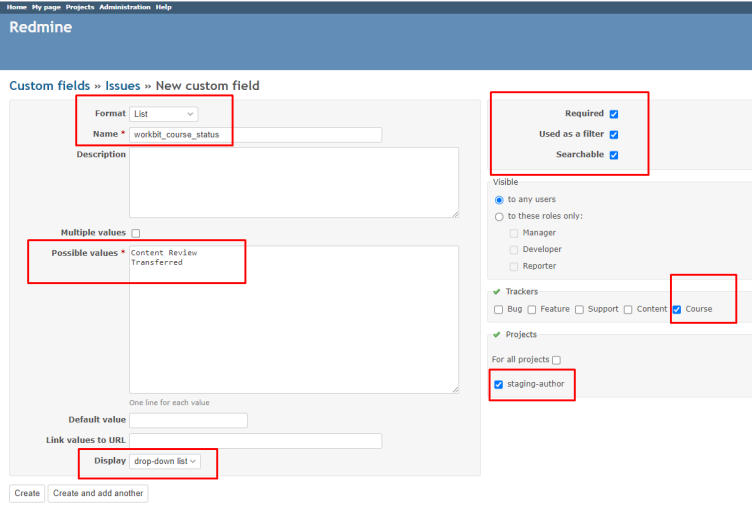 Figure 17: Configuring MAXRES_course_status field
-
Configuring the Project
-
Open the project created for the Construct tenant.
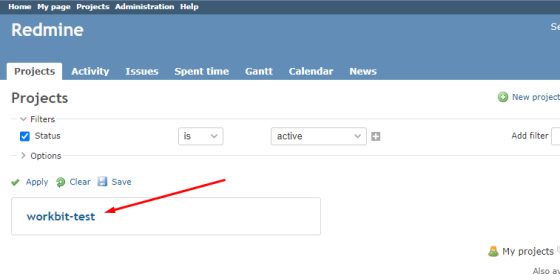 Figure 18: Project settings
 -
Ensure required trackers have the MAXRES custom fields enabled.
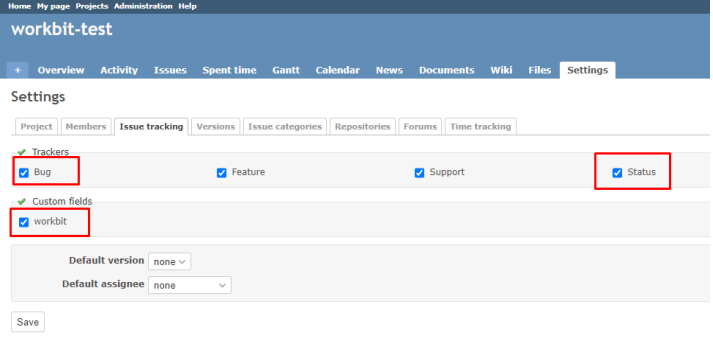 Figure 19: Configuring trackers
 -
Add members to the project.
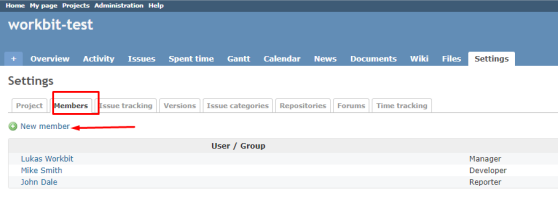 Figure 20: Adding members
Resolving CORS Issues
If CORS is disabled, Construct cannot access the Redmine API. Enable CORS in your Redmine configuration file. Example for Apache:
# Always set these headers.
Header always set Access-Control-Allow-Origin "http://localhost:5000" # Replace with Construct Instance URL
Header always set Access-Control-Allow-Methods "POST, GET, OPTIONS, DELETE, PUT"
Header always set Access-Control-Max-Age "1000"
Header always set Access-Control-Allow-Headers "Content-Type, Constructization"
# Rewrite rule for OPTIONS request.
RewriteEngine On
RewriteCond %{REQUEST_METHOD} OPTIONS
RewriteRule ^(.*)$ $1 [R=200,L]
Adjust the configuration file path based on your server and Redmine version.