Element Settings
General
Locked
The checkbox under Locked, called Lock this and children, locks the content item.
Children is a term used to describe elements under other elements: Elements to KLPs, KLPs to TPs, TPs to Learning Objects.
 Figure 1: Locking function
Label
The Label input box is for creating a distinct label for each content item. This Label is used for debugging and auditing purposes.
The Label can be the same or different from the Title.
The return icon next to the Label (in the red highlighted box in Fig. 2) sets the Label to the default text: "New Component Title".
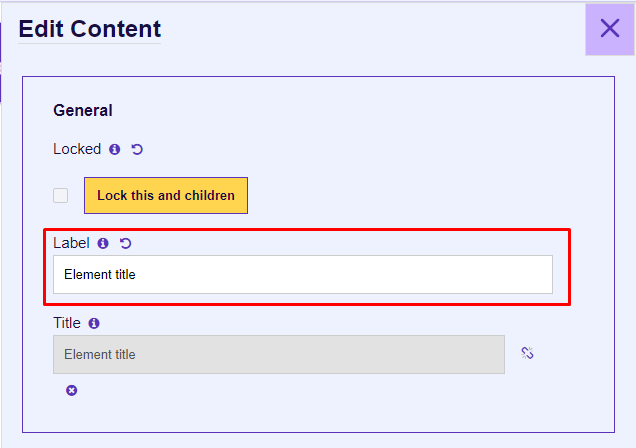 Figure 2: Element label
Title
The Title input box is for creating the Title for the content item.
The set Title will appear in the Presentation view and the Word outputs in the Student and Instructor windows.
The Title is linked to the Label by default. It can be unlinked by clicking the chain icon (in the red highlighted box in Fig. 3) next to the title input box.
The Title box can be left empty.
The Title in the Presentation Instructor and Student windows is taken from the KLP title.
The x icon (in the red highlighted box in Fig. 3) can be selected to remove the Title.
 Figure 3: Title input
Properties
The Handle Resize Event checkbox was created for CBT and is not functional for ILT.
 Figure 4: Handle Resize Event
There are two functions under Adobe Animate Zip Archive: Select an Asset and Select an External Asset.
 Figure 5: Adobe Animate Zip Archive selection
To set an animation, click the Select an Asset button and choose an animation zip asset from the Asset Library or upload a new HTML asset zip asset.
Important: The files in the zip folder cannot be wrapped in a directory—the files must be at the root of the zip folder.
The Select an External Asset button is not currently functional.
The SWF Asset Kenexa Id input box is created for migration purposes. The Kenexa Asset ID can be put in this box as a reference to the SWF asset within Kenexa.
Output Types
There are two Output Types in Construct: ILT and Word.
 Figure 6: Output types
ILT Settings
When the ILT checkbox is selected, the user can configure the ILT Settings:
- Instructor
- The element will be reflected in the Instructor presentation window.
- Only text and list components are functional in the instructor presentation window.
- Student
- The element will be reflected in the Student presentation window.
 Figure 7: ILT Output types
Word Settings
When the Word checkbox is selected, the user can configure the Word Settings:
- Student Notes
- Adds the element to the Student Manual Word Output.
- Instructor Guide
- Adds the element to the Instructor Guide Word Output.
- Also adds text to the Instructor Window in the presentation view (only text and list components are functional).
 Figure 8: Word Output types
Metadata
Job Roles
When clicking the Job Roles button, a dropdown box with various job roles will appear.
 Figure 9: Job Roles metadata
Job Roles can be added and removed in the Administration tab.
The Job Roles in the Administration tab can be found by clicking:
- Hamburger menu > Administration > Metadata.
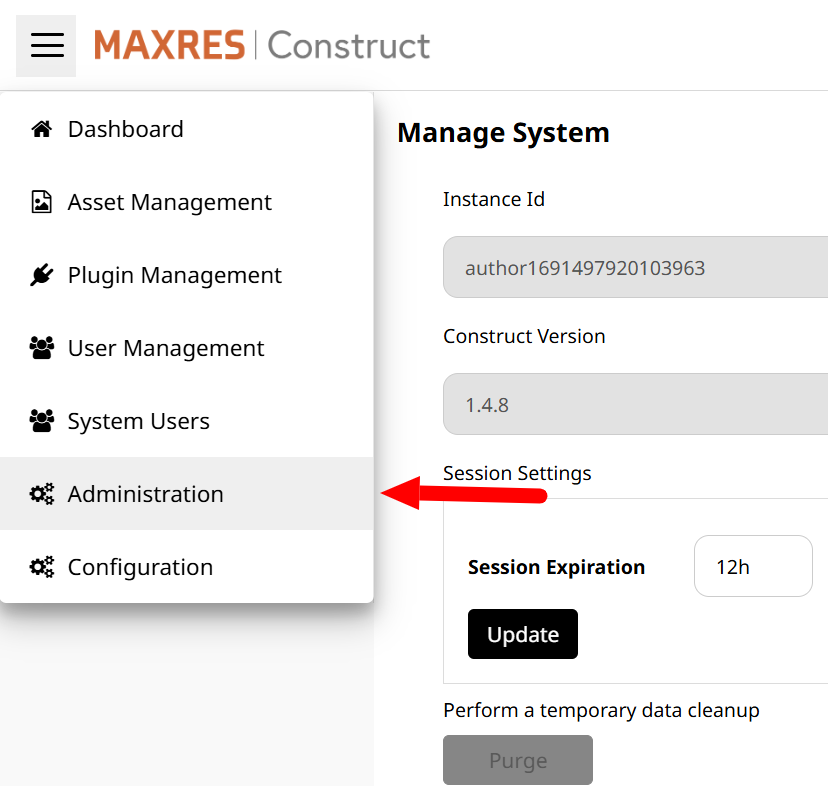 Figure 10: Administration tab
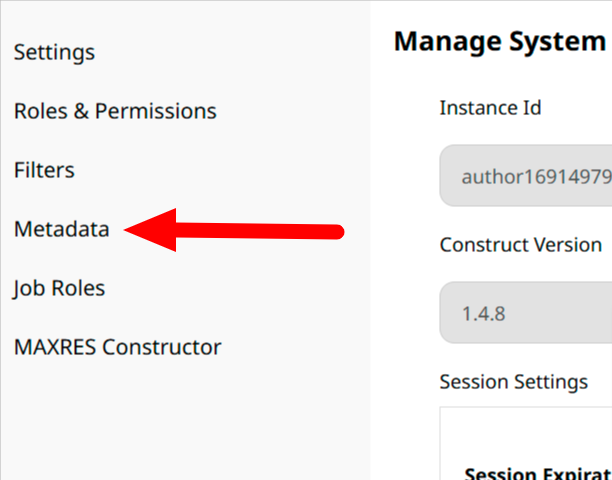 Figure 11: Metadata Tab
Other Metadata
The Other Metadata button is for creating metadata that is not covered by Job Roles.
Currently, this functionality is used for migration purposes but can be adapted for future use.
 Figure 12: Other metadata
Update and Cancel
Important: Click Update after editing the content item to save changes; otherwise, changes will not be saved.
To cancel changes, click the Cancel button or the purple X button at the top-right of the edit form.
 Figure 13: Update and cancel buttons
 Figure 14: The X button